How to Password Protect an Excel File: Easy How-to Guide
Feb 14, 2023
Do you have a spreadsheet in Excel with sensitive information?
One way to do that is by password-protecting your Excel files. This will keep the information in those files private; only people with your permission can access or change it.
This blog post will give you step-by-step instructions on 'how to password-protect an Excel file.'
Here, we will discuss the following:
-
What a protected workbook is in Excel
-
How to password-protect an Excel file
-
Different protect workbook options in Excel
-
Final thoughts on how to password-protect Excel files
Read Also: How to Add Leading Zeros in Microsoft Excel
What is the project workbook tool in Excel?
Protect Workbook is an easy-to-use tool for anyone looking to protect their Excel files. It enables users to create a password for their Excel workbook and ensure that personal data and other important information remain secure on their computers.
With Protect Workbook, protecting your Excel files has never been easier - you don't have to download any software! All you need is the password of your choice, and you can start protecting your Excel sheet with just a few clicks.
How to Password Protect an Excel File
-
Open your Microsoft Excel Document.

-
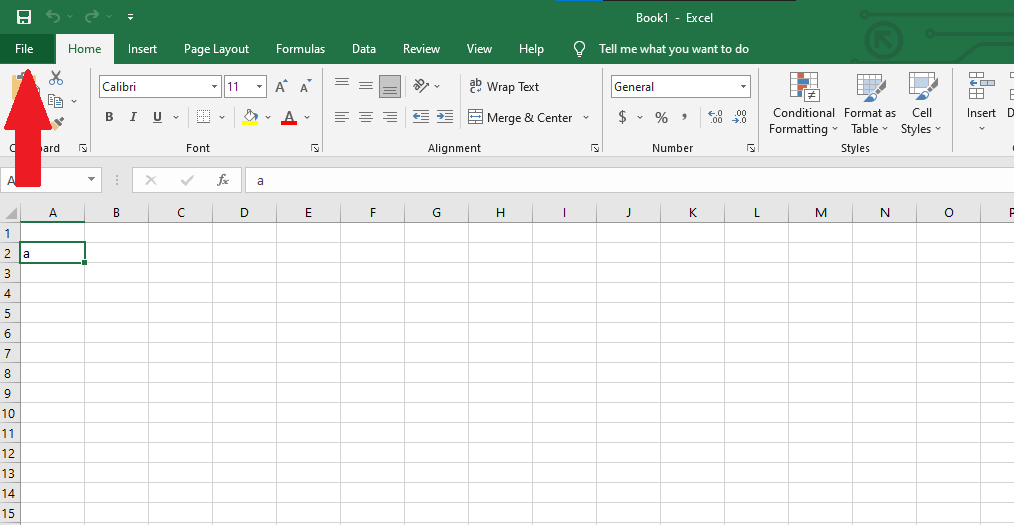
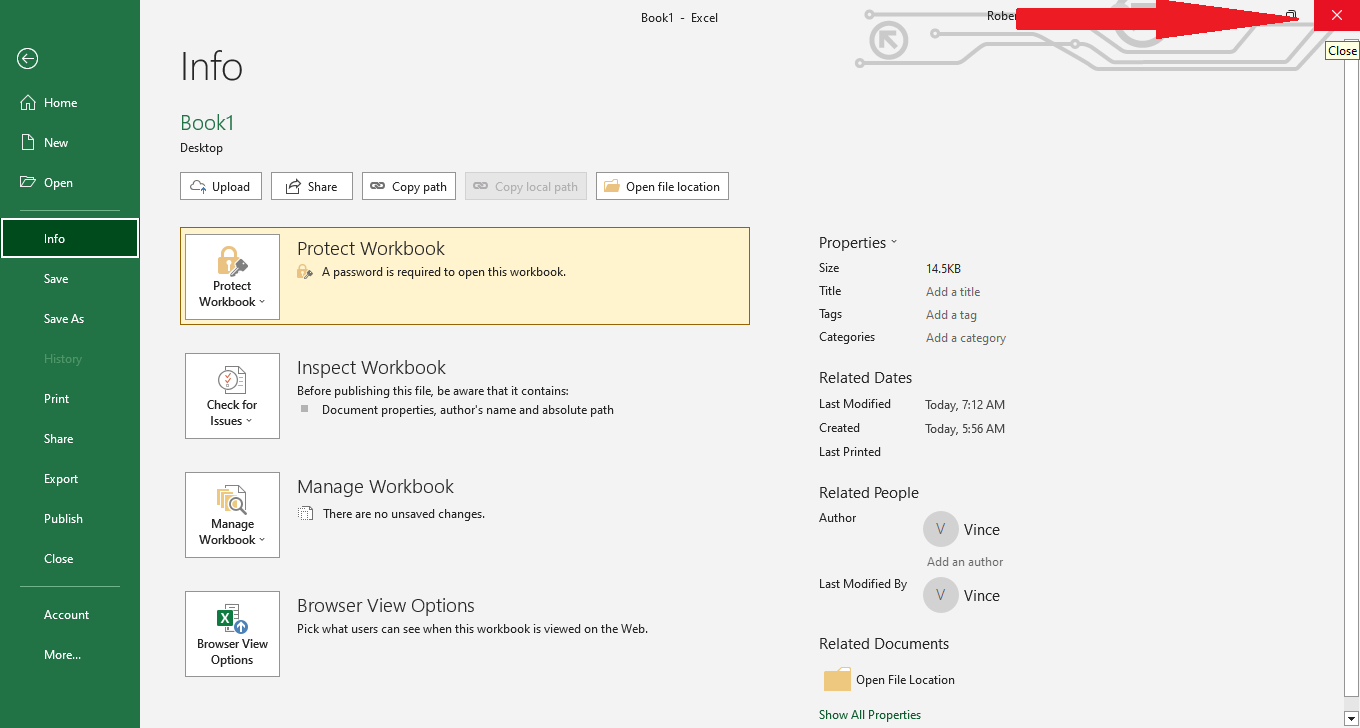
Go to "File Tab."
-
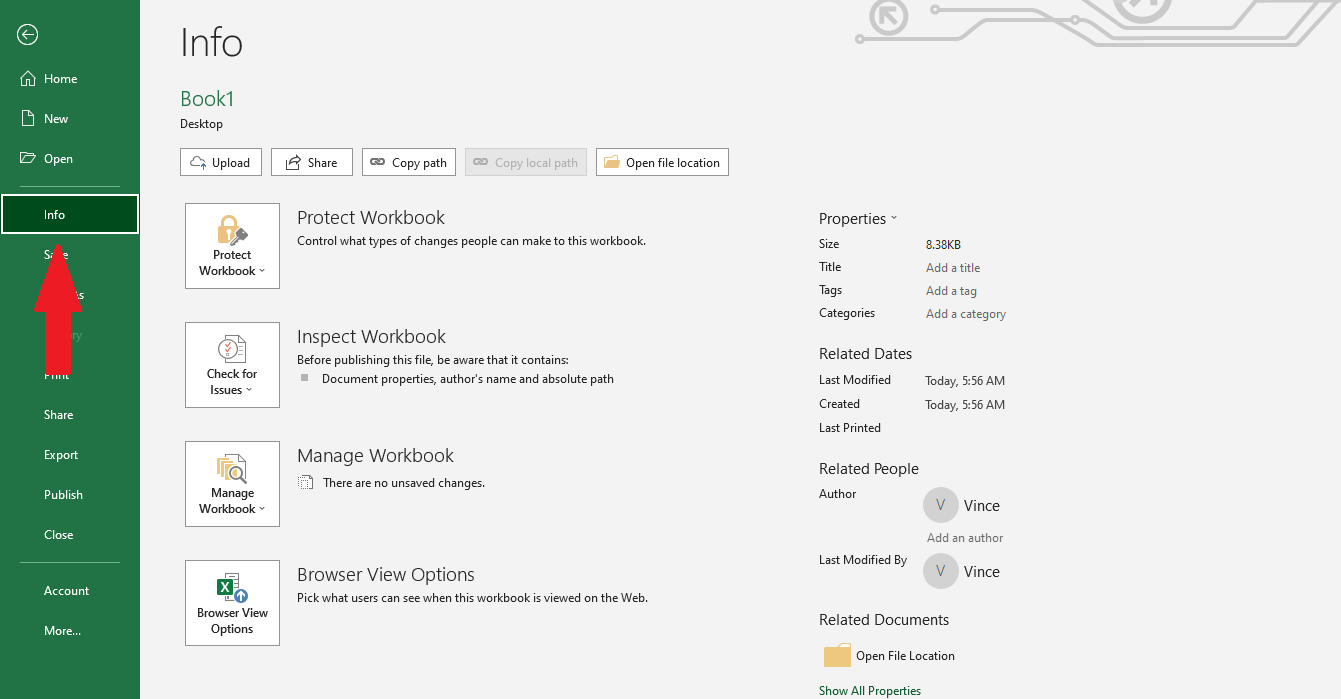
After finding the "File Tab," Go to "Info."
-
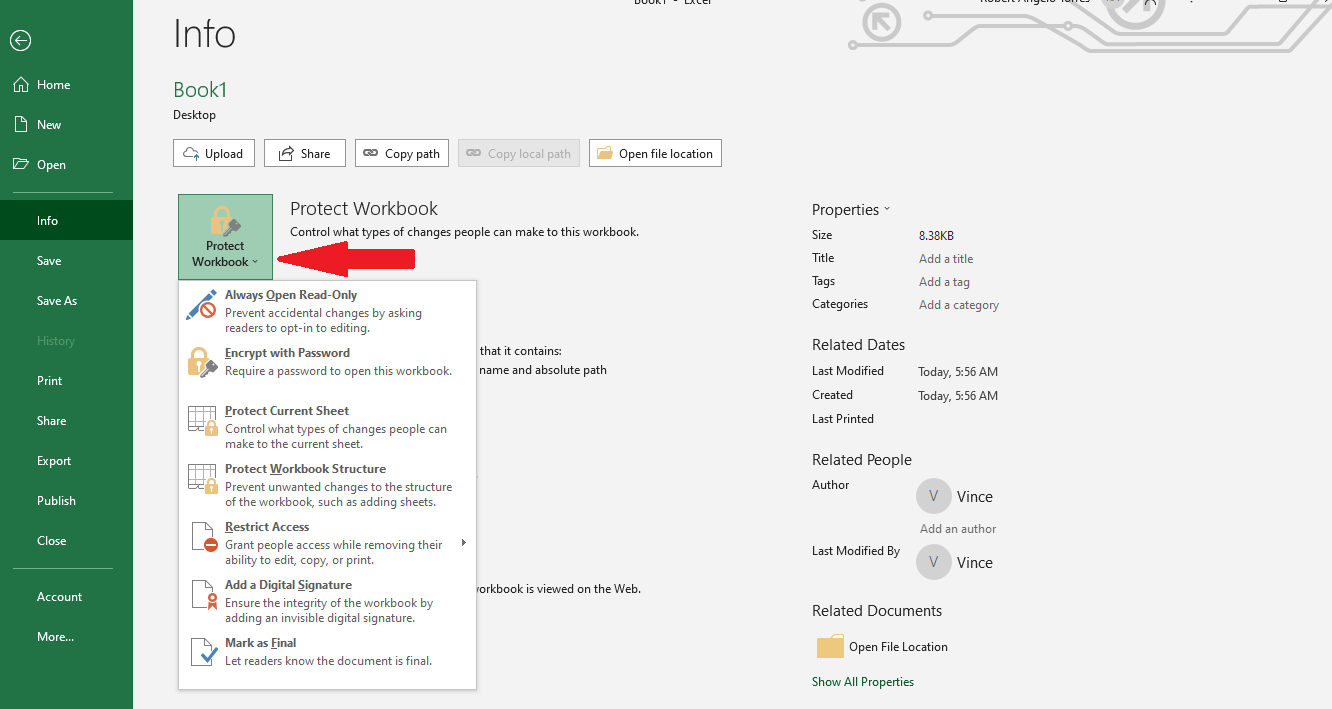
Go to "Protect Workbook."
-
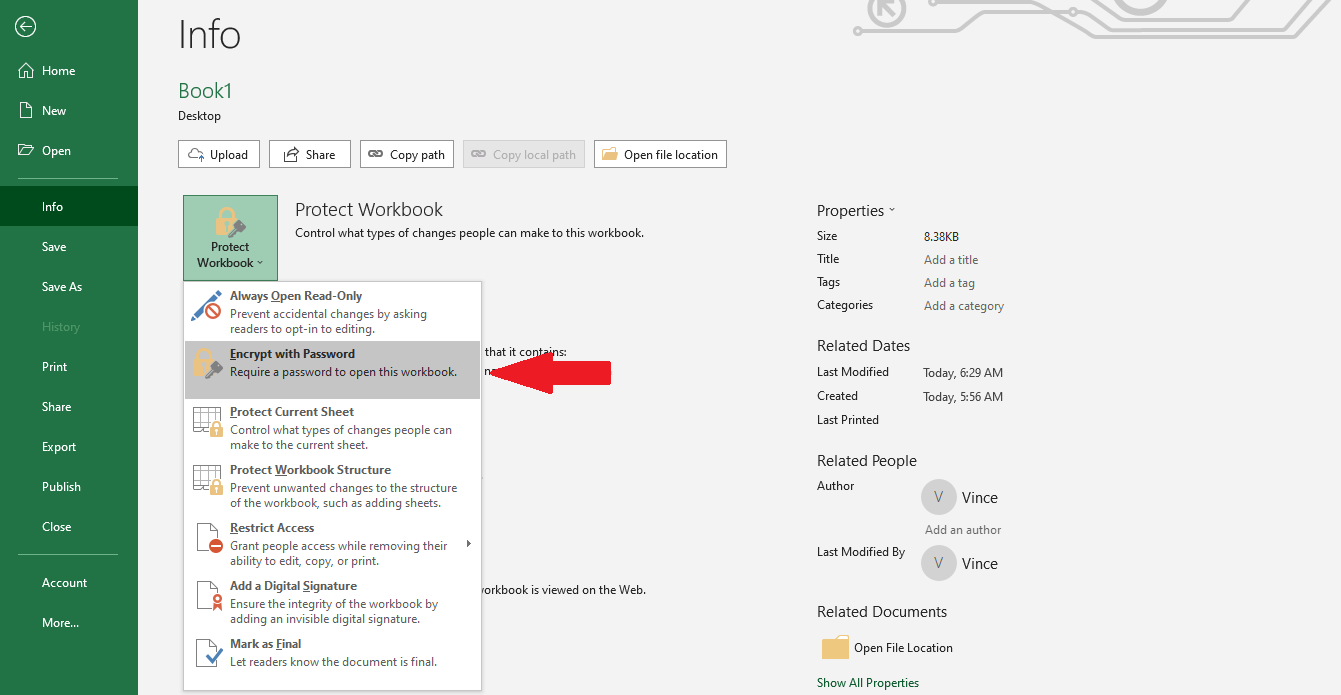
Select "Encrypt with Password."
-
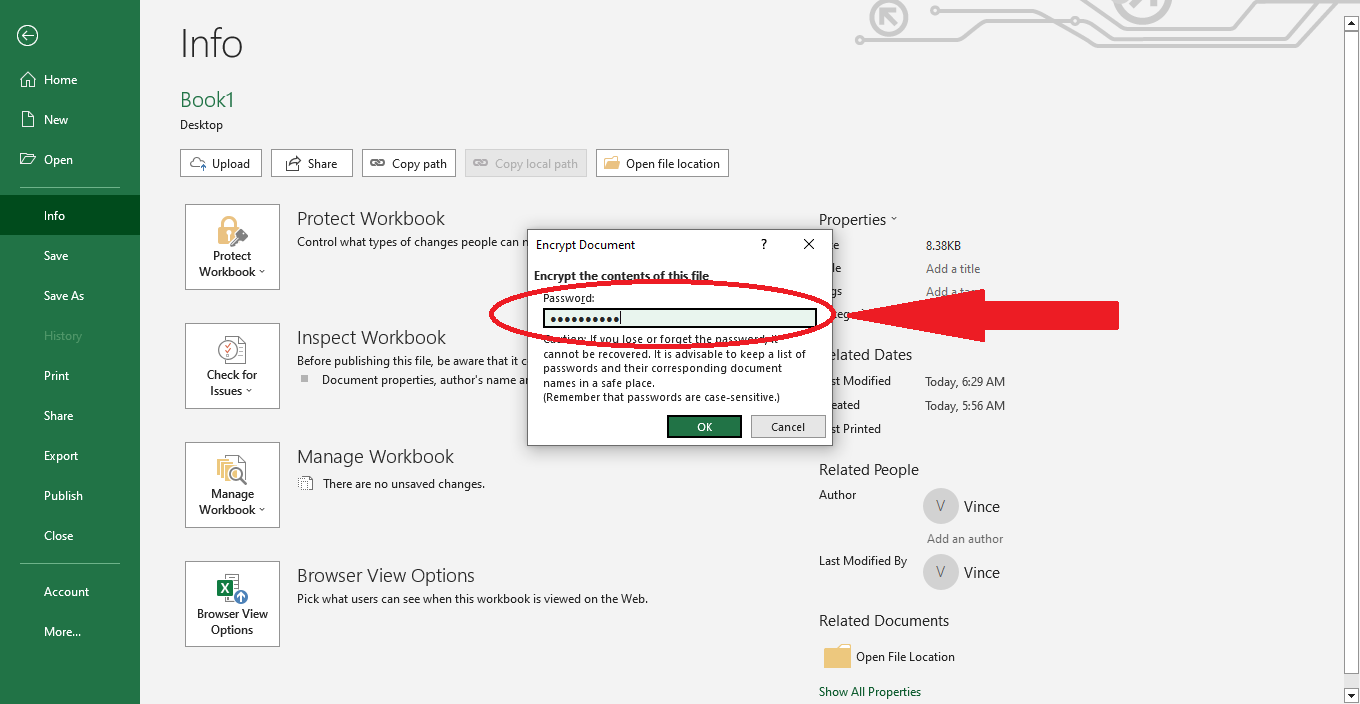
Enter your desired password to secure your Excel file.
-
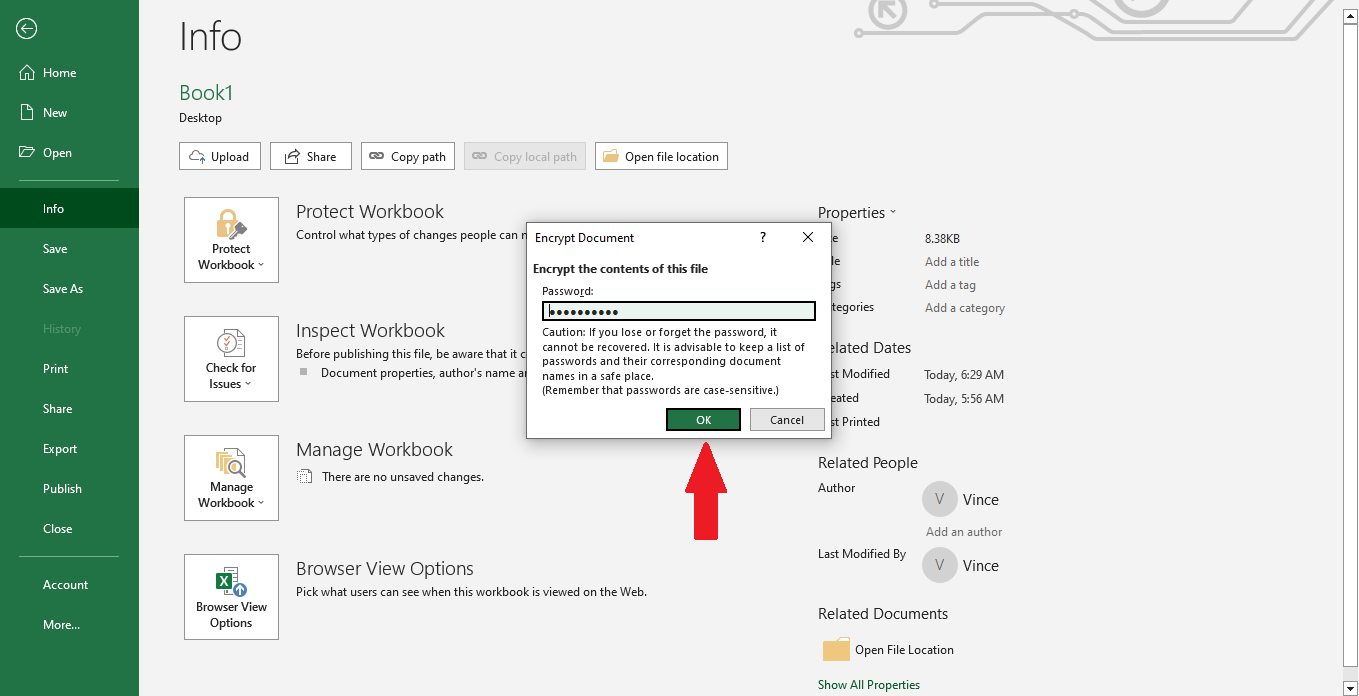
After typing your password for your Excel file, click "OK."
-
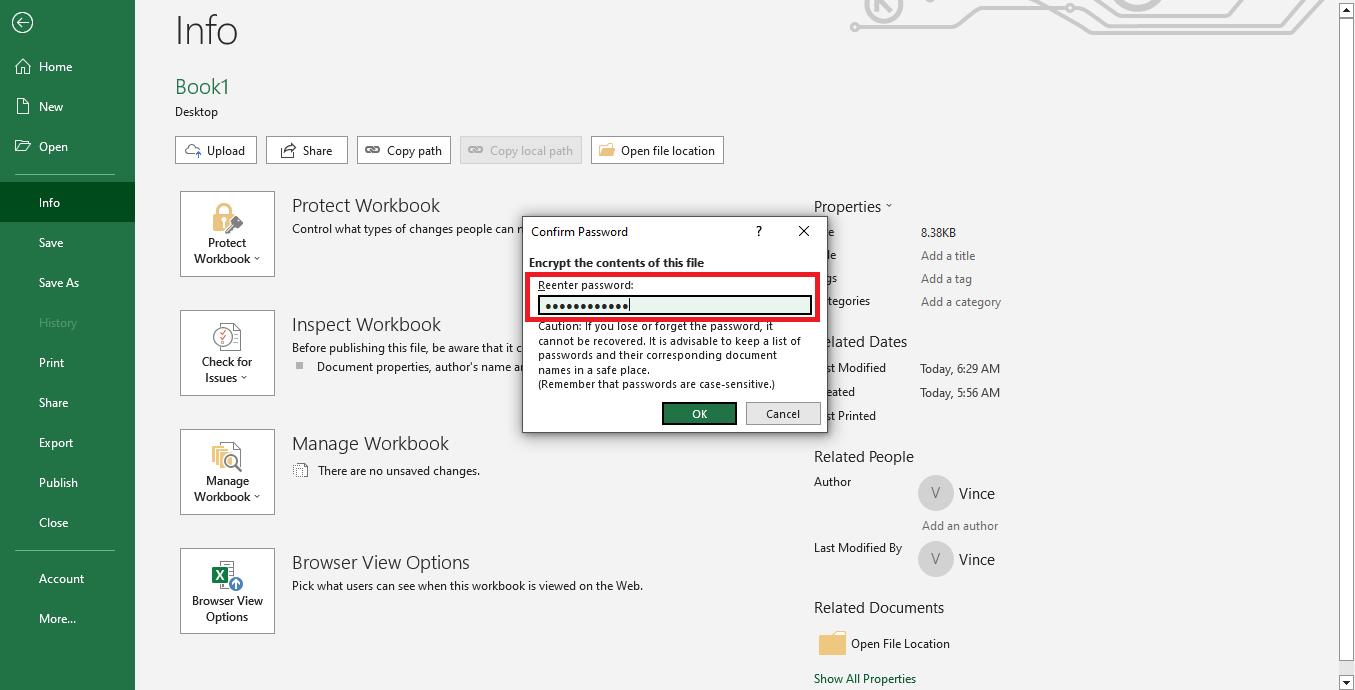
Re-enter your password.
-
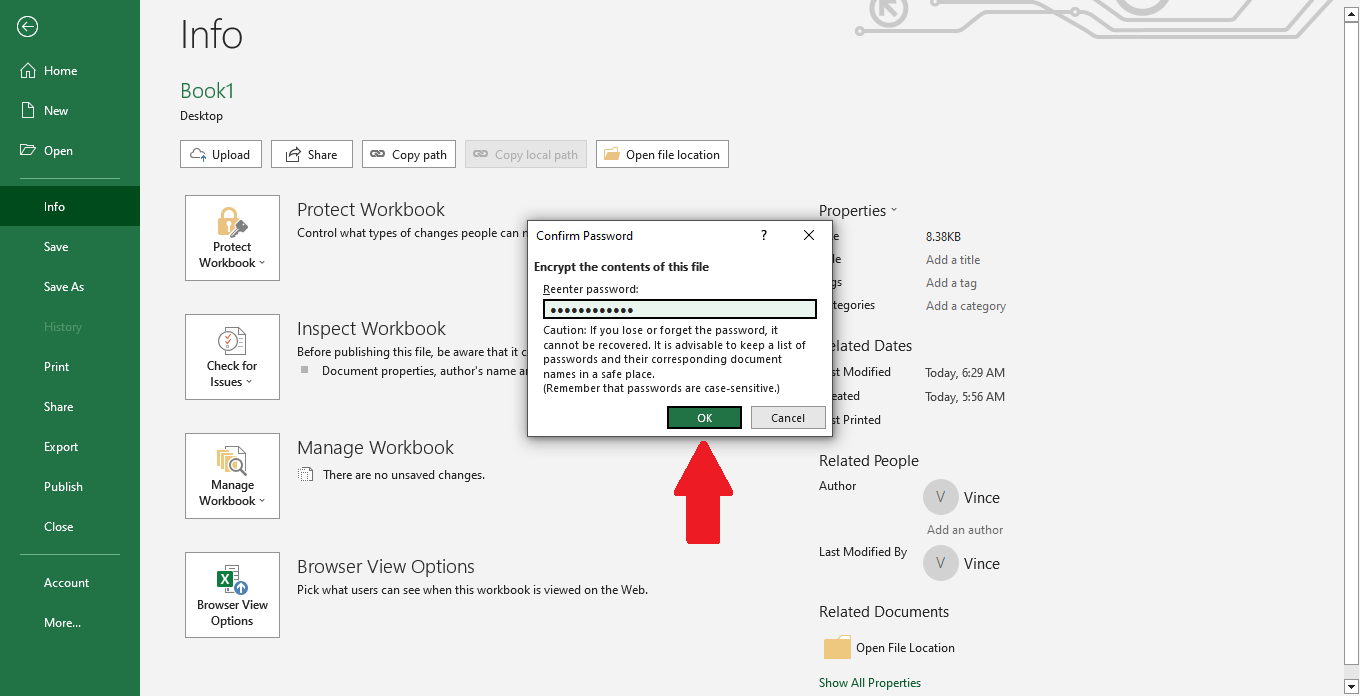
Click "OK."
-
Click "Close."
-
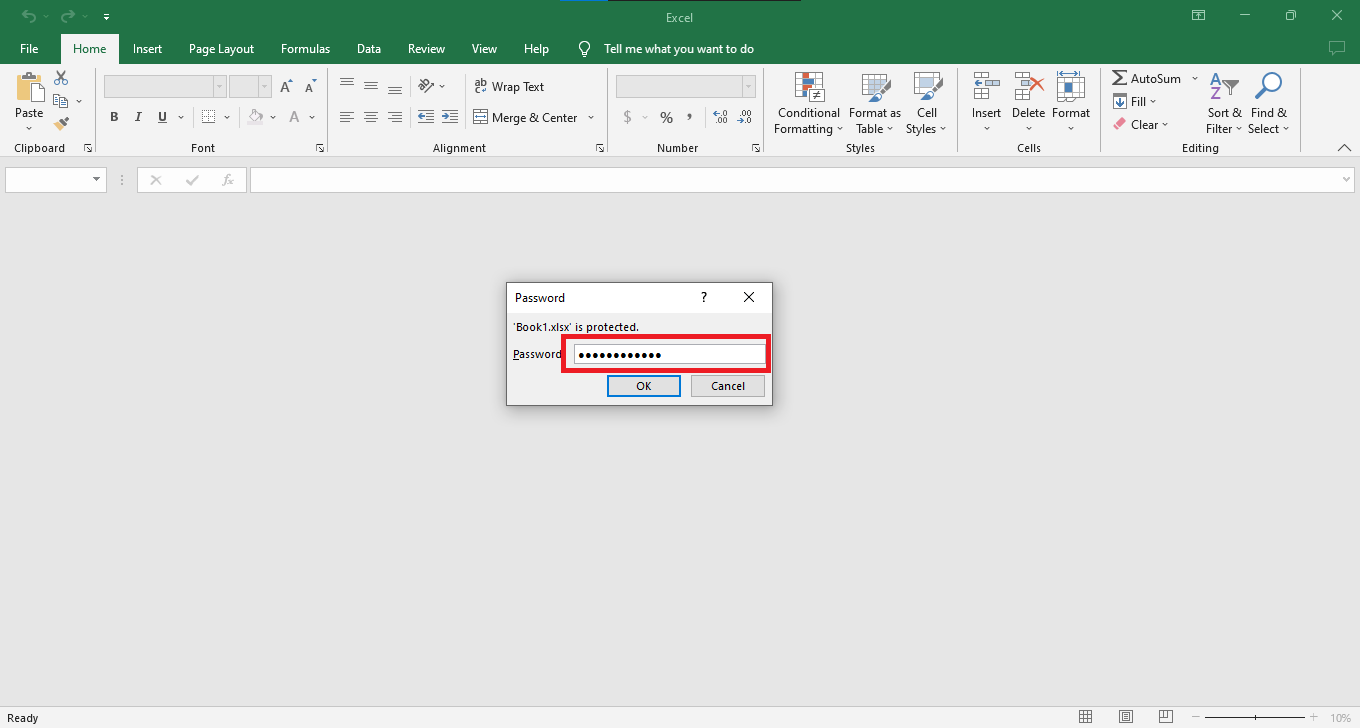
Open your Microsoft Excel document again with a password to open it.

-
Now that your File is password protected enter the Excel file password to access it.
-
After clicking "OK," you can access your hack-free Excel file.

Read Also: Why Microsoft Excel Cannot Paste the Data
Different Kinds of Protect Workbook Options in Excel
Protect the current sheet.
Excel makes it easy to do this: select save and click the Protect Current Sheet in your computer's Microsoft Excel.
It will ensure that no unwanted changes can be made to your document without your permission when using Excel.
Protecting your Excel documents is a straightforward way to stay organized and keep sensitive information safe while working with Excel.
Protect workbook structure.
Protecting your workbook structure in Excel is necessary for any computer user hoping to store their important documents.
To protect your Excel workbook, click the save icon and choose the "Protect Workbook Structure" option on the menu. You can no longer modify the cells in that Workbook if done correctly.
However, depending on what best suits your needs, you can still make changes if you first unprotect it with a password or without one.
Protecting your Excel workbooks is a crucial step to take if you want to keep digital information safe and secure.
Restrict access.
If you want to restrict access to an Excel workbook on your computer, it's easy to do with a few simple steps. Begin by opening the document in Excel and clicking the "Save As" button.
Select a file format like .xlsx and ensure the "Tools for Protecting a Workbook" section is visible in the dialog box. Use the "Restrict Access" checkbox to activate protection for your Excel file.
After activating protection, click "Save," and the necessary security features will be in place to protect your Excel workbook from unauthorized access.
Add a digital signature.
Electronically signing a document is now easier than ever with Microsoft Excel. Whether you need to sign an Excel file for a professional purpose or other personal reasons, adding your digital signature to an Excel workbook is just a few simple steps away.
Click the 'Protect' tab from the ribbon and choose 'Add Digital Signature' from the drop-down menu. You can then select your computer to ensure that your signature must be used on that document in Excel.
After clicking save, you will have added your digital signature to any Excel files without printing a hard copy for signing purposes.
Read Also: How to Add Signature in Excel?
Final Thoughts on How to Password Protect an Excel File
By following the simple steps outlined in this article, you can ensure that only those with the correct password can access your File. So why not give it a try?
You can visit our home page for more easy-to-follow how-to and step-by-step guides. Check the links in related articles for further details about Excel Templates!
Frequently Asked Questions on How to Password Protect an Excel File:
Can I share a password-protected Excel file?
You can share a password-protected Excel file with your colleagues, clients, or anyone else. Password protection is designed to prevent unauthorized access to your files and ensure only those who are supposed to see what's inside get access.
What are the benefits of password-protecting an Excel file?
Putting passwords in an Excel file offers several advantages. It encrypts the data in the File, making it secure against unauthorized access.
How do I remove a password from an Excel file?
-
Open your Excel file and select the Office button in the Window's upper-left corner.
-
From there, navigate to the Prepare tab and choose Encrypt Document from the menu options.
-
A prompt to enter a password will appear on your screen; leave this field blank and select OK.
Related Articles:
Want to Make Excel Work for You? Try out 5 Amazing Excel Templates & 5 Unique Lessons
We hate SPAM. We will never sell your information, for any reason.


