How To Insert Shapes In Excel in 6 Simple Steps
Mar 20, 2023
Have you ever wanted to add more visual appeal to your Excel spreadsheet?
Adding shapes to the spreadsheet can emphasize specific cells or data points and make the report much easier to read.
In this blog, we will cover the basics of inserting shapes in Excel and provide step-by-step instructions on what it takes to accomplish this task.
Read on as we discuss:
-
Adding shapes in Microsoft Excel.
-
Formatting shapes in Microsoft Excel.
-
Final thoughts on how to insert shapes in Excel.
-
Frequently asked questions on how to insert shapes in Excel.
Read Also: How to Add Leading Zeros in Microsoft Excel
Add Shapes in Microsoft Excel.
Adding shapes to your spreadsheet will improve your data visually, making it easier to understand. Here's how:
-
Go to Excel's Ribbon.

-
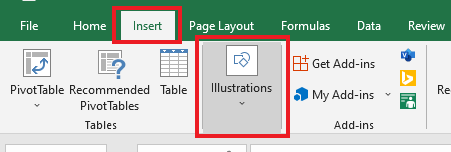
Go to the Insert Tab in the Excel Ribbon and locate the Illustration menu.
-
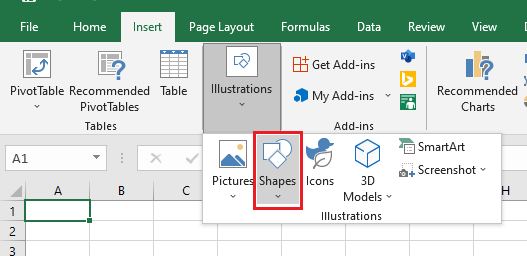
Under the Illustrations group, click the Shapes button.
-
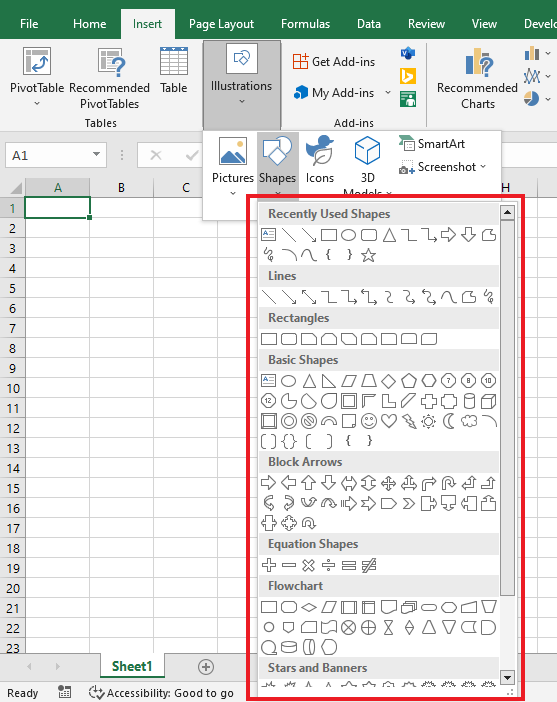
You can choose all the shapes available in the Shapes drop-down gallery.
-
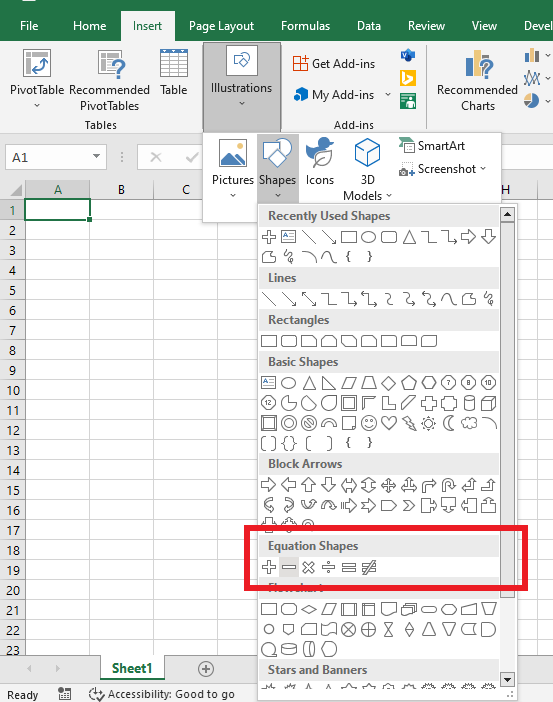
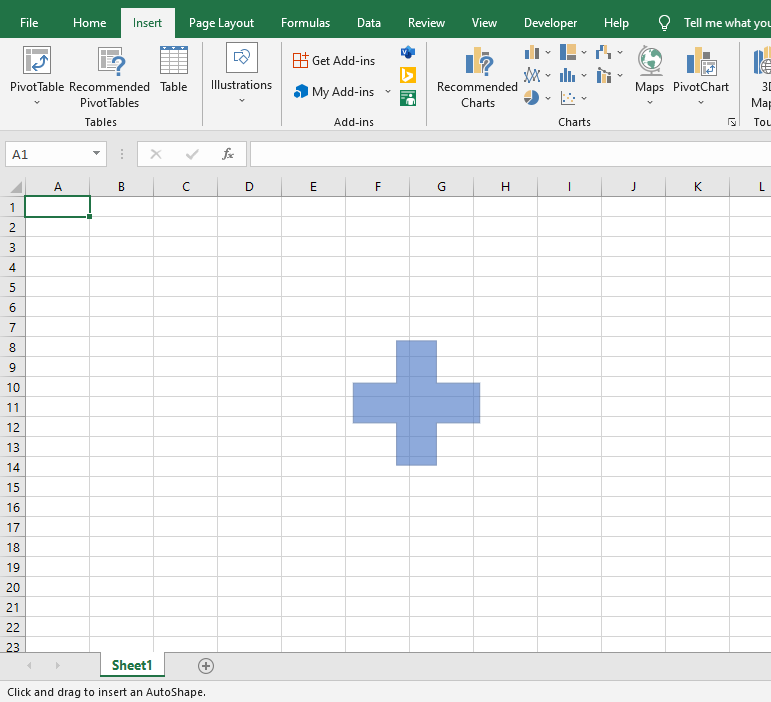
For example, let's choose a shape under Equation Shapes.
-
Select a place in your spreadsheet where you want to draw the shape.
Read Also: Fix Excel is Waiting for Another Application to Complete an OLE Action
Format Shapes in Microsoft Excel.
Now let's make your shape more stylish. To format your shape style:
-
Go to the Shape Format Tab. It will automatically show up when you insert a shape in your spreadsheet.

-
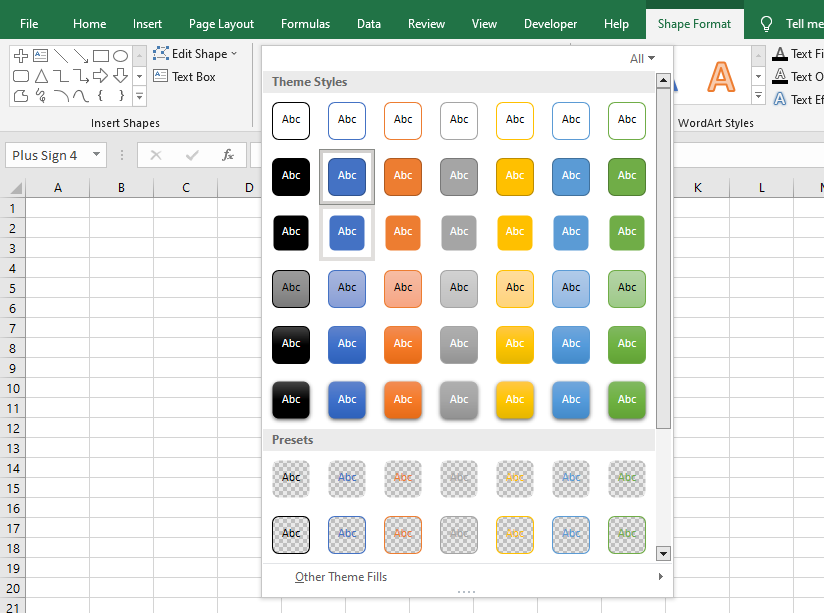
Go to the Shape Styles group, click more, and it will direct you to the Shape Styles Gallery.

-
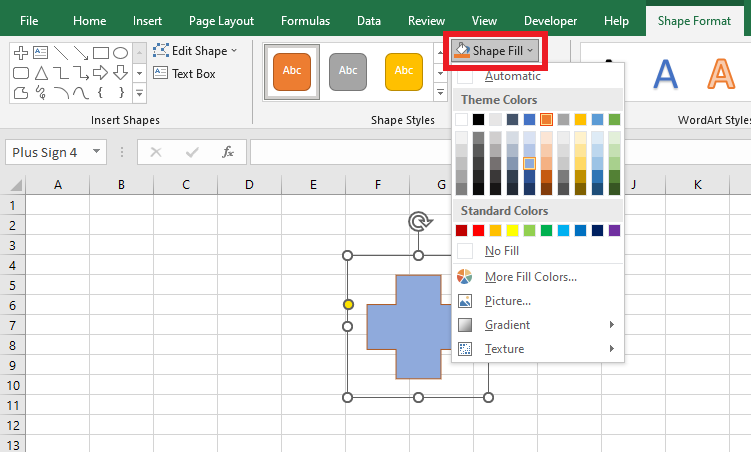
Choose a Theme Style. You can also choose the Shape Fill color option in the Shape Styles Group.
-
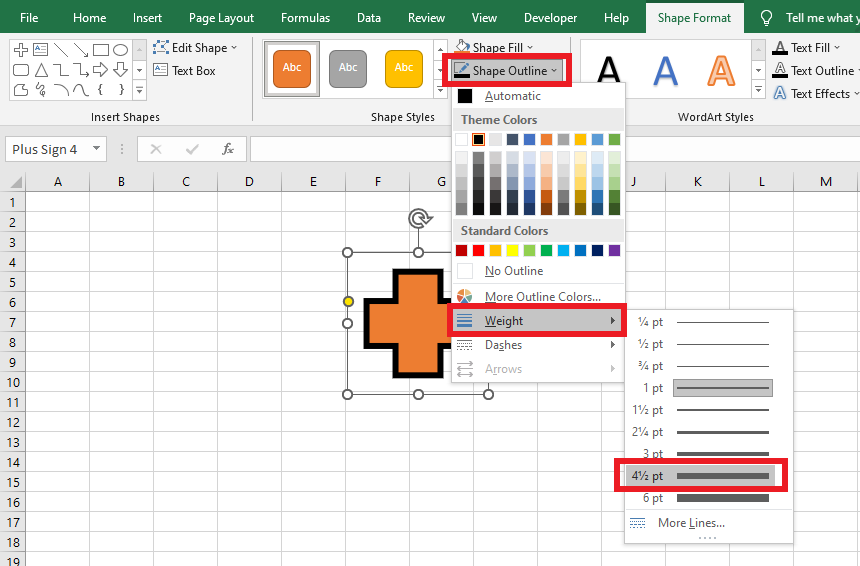
Adjust your shape outline and its weight.
-
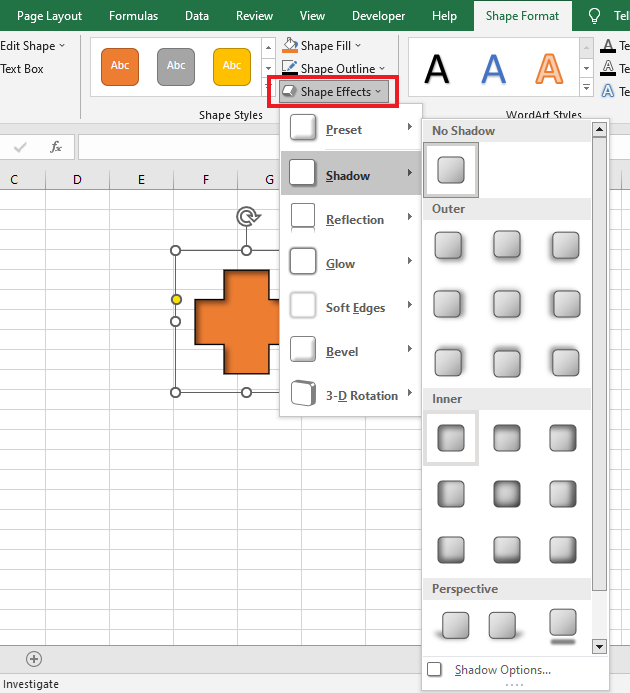
Go to the Shape Effects option and select an effect for your shape.
Add Text to Your Shape.
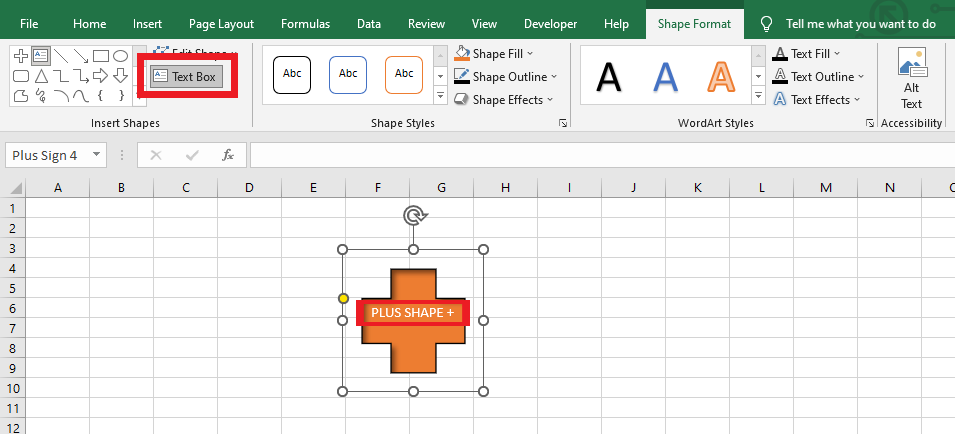
To add text in your shape, click Text Box, and type the words you want to see appear. You have now learned how to format shapes in Microsoft Excel!
Read Also: How To Highlight Duplicates In Excel?
Final Thoughts on How To Insert Shapes in Excel.
Adding visual appeal to your Excel spreadsheet will be easy now you have learned how to insert and format shapes in Excel.
For more easy-to-follow Excel guides, visit the Simple Sheets blog.
Frequently Asked Questions on How To Insert Shapes in Excel:
Why can't I insert any shapes on my Excel spreadsheet?
In Excel, go to the For Objects option and select Show All, as it will let you add shapes, charts, and images shown in your spreadsheet. If the Show All option setting is unchecked, it won't add shapes, charts, and images to your spreadsheet but will appear as greyed objects.
Excel has fun animations that you can add. To get them, go to the following:
-
Go to the Insert tab.
-
Click on the Animation drop-down menu.
Here you can find different types of animations. In your workbook, you can add them to things like text boxes, shapes, and charts.
Can I add an image into a shape?
To add an image to a shape, do the following steps:
-
Click on the shape.
-
Look for the "Shape Fill" option and click on it.
-
Finally, find the image you want to use and select it; click 'Insert' to add it to the shape.
Related Articles:
Excel Macro Button: What is it and How to Create One
A Reference Isn't Valid Excel Error | How to Fix this Error?
Want to Make Excel Work for You? Try out 5 Amazing Excel Templates & 5 Unique Lessons
We hate SPAM. We will never sell your information, for any reason.


